

How To Play Dvd On Laptop Hp
Z7_3054ICK0KGTE30AQO5O3KA30N0
hp-concentra-wrapper-portlet
![]() Actions
Actions
HP PCs - Using CyberLink PowerDVD to play videos, music, and movies (Windows 8)
This document applies to HP Desktop and Notebook computers with CyberLink PowerDVD and Windows 8.
Use CyberLink PowerDVD to play video, music, and movies on your computer. PowerDVD also allows you to create and view slideshows, create and listen to music playlists, and upload videos to YouTube.
MoovieLive is the movie information website for PowerDVD. For more information, see the MoovieLive website.
note:This document provides basic instructions for using CyberLink PowerDVD. For more detailed information, use the CyberLink PowerDVD application help. To access PowerDVD Help, click the Help
icon.
Opening CyberLink PowerDVD
To open PowerDVD, complete the following steps:
-
At the Start screen, type CyberLink PowerDVD to open the Search charm.
-
Click CyberLink PowerDVD from the list of results.
-
PowerDVD displays the PowerDVD main menu.
Finding the PowerDVD version number
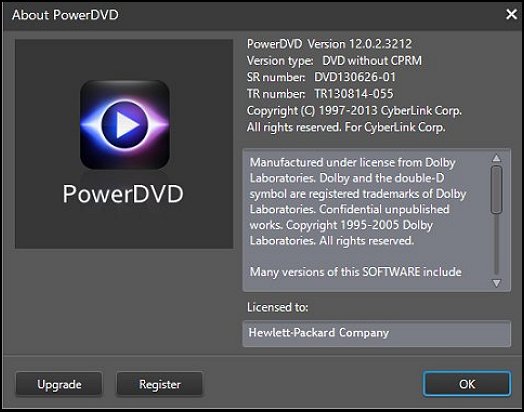
This document addresses CyberLink PowerDVD Versions 10, 11, and 12. To determine your version, click or touch the CyberLink PowerDVD heading in the upper left corner of the main menu. The About PowerDVD window opens and identifies your Power DVD Version.
Figure : About PowerDVD screen
Follow the links to the section for your PowerDVD Version number.
CyberLink PowerDVD Version 12
PowerDVD lets you view and manage movies, videos, photos, and music.
Figure : PowerDVD main menu
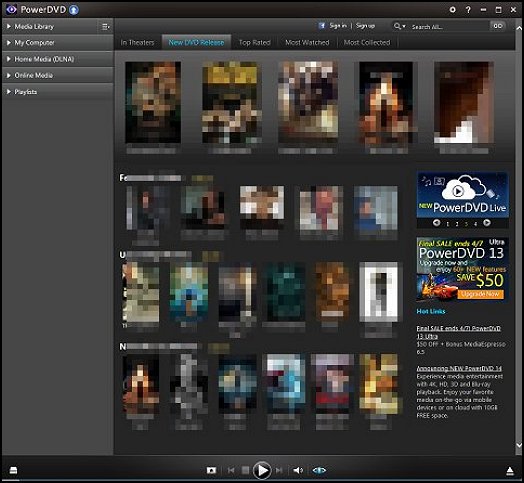
The main menu displays menu options along the left side of the screen. Menu options include:
-
The Media Library menu finds media including movies, videos, photos, and music available on your computer or through MoovieLive.
-
The My Computer menu allows you to search your computer drives for media.
-
The Home Media (DLNA) menu alows you to access media across your home network from your other DLNA enabled home media devices.
-
The Online Media menu finds media online through your Facebook account, YouTube, or Flickr account.
-
The Playlists menu allows you to access your media playlists.
Watching movies
Follow these steps to watch movies:
-
Open PowerDVD.
-
Insert a movie disc (DVD or Blu-Ray) into the disc drive on your computer.
note:
Make sure that the movie disc is compatible with the disc drive on your computer.
-
Your movie begins playing automatically.
note:
The first time you load a Blu-ray movie disc, you may be asked to enter a region and country code in the Settings menu. Follow the on screen instructions.
-
Use buttons along the bottom of the window to control your movie.
-
The Select source
 button allows you to select the source of your movie.
 -
The Media playback menu
 button provides options for bookmarks, comments, subtitles, and other movie information.
 -
The More functions
 button displays more movie control options.
 -
The Rewind/Step backward (when paused)
 button rewinds the movie.
 -
The Previous
 button skips back to the beginning of the previous chapter.
 -
The Stop
 button stops the movie.
 -
The Play/Pause
 button toggles between pausing and playing the movie.
 -
The Next
 button skips ahead to the beginning of the next chapter.
 -
The Fast forward/Step forward
 button fast forwards the movie.
 -
The Mute/Volume adjustment
 button adjusts the movie volume.
 -
The Zoom
 button zooms in on the movie.
 -
The TrueTheater effects
 button displays the TrueTheater effects window.
 -
The Eject disc
 button ejects the movie from the disc drive.
 -
The Full screen
 button toggles in and out of full-screen mode.
-
-
If you stop or close PowerDVD while playing a movie, and even play other media afterwards, the next time you play that specific disc title, you can click Resume to continue from the point where you previously stopped watching or click Restart to watch the disc from the beginning.
Figure : Movie resume or restart screen

-
To remove a movie disc from the disc drive, click the Eject disc
button in the lower right corner of the window.
The PowerDVD main menu includes opportunities for you to purchase discs, review movies, and participate in the online MoovieLive community. Join using Facebook by selecting Sign in, or create a CyberLink account by selecting Sign up from the top of the PowerDVD main menu screen.
Viewing and uploading videos
View and upload videos to YouTube or Facebook.
-
Open PowerDVD.
-
Click to open Media Library on the PowerDVD main menu, and then select Videos.
Figure : PowerDVD menu with Media Library open and Videos selected

-
To view individual videos, double-click a video folder. The videos display in the media pane.
-
Select the video to be viewed from the media pane, then click the Play/Pause
 button.
 -
Use the buttons along the bottom of the window to control the video.
-
The Previous
button skips back to the beginning of the video. -
The Stop
button stops the video. -
The Play/Pause
button toggles between pausing and playing the video. -
The Next
button skips ahead to the end of the video. -
The Mute/Volume adjustment
button adjusts the video volume. -
The Zoom
button zooms in on the video. -
The TrueTheater effects
button displays the TrueTheater effects window.
-
-
Use the Back
 button at the top of the window to return to the media pane
 -
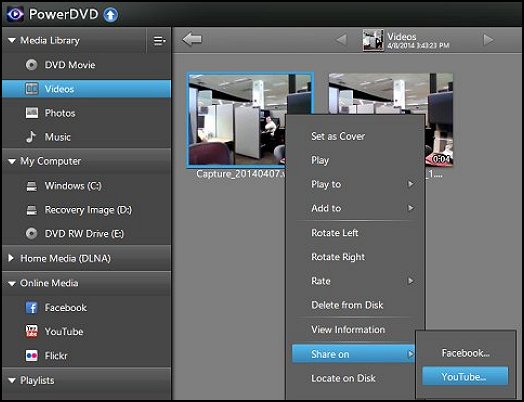
To share a video, right-click the video from the media pane to open the video menu, then scroll down to Share on to open the popup window.
Figure : Videos window with Share on and YouTube selected
-
In the popup window choose to share using YouTube or Facebook.
To share on YouTube, select YouTube, and then enter your YouTube Username and password. Click Next.
To share on Facebook, select Facebook, and then enter your Facebook Username and password. Click Next.
-
To remove a video disc from the disc drive, click the Eject disc
button in the lower right corner of the window.
Viewing and sharing photos
View photos and share photos on Facebook and Flickr.
-
Open PowerDVD.
-
Click to open Media Library on the PowerDVD main menu, and then select Photos.
Figure : PowerDVD menu with Media Library open and Photos selected

-
To view photos, double-click a photo folder. The photos display in the media pane.
-
Double-click to open individual photos, and then use buttons along the bottom of the window to adjust your photo.
-
The Adjust slideshow preferences
 button allows you to set duration and effect choices for slideshows.
 -
The Rotate left
 button rotates your photo 90 degrees to the left.
 -
The Rotate right
 button rotates your photo 90 degrees to the right.
 -
The Previous
button skips back to the first photo in the photo folder. -
The Stop
button stops proceeding through the photo folder. -
The Play/Pause
button toggles between pausing and proceeding though the photo folder. -
The Next
button skips ahead to the last photo in the photo folder. -
The Mute/Volume adjustment
button adjusts the volume. -
The Zoom
button zooms in on the photo. -
The Share
 allows you to share your photo.
-
-
Use the Back
button at the top of the window to return to the media pane. -
To share a photo from the media pane, right-click the photo from the media pane to open the photo menu, then scroll down to Share on to open the popup window.
Figure : Photos window with Share on and Facebook selected

-
In the popup window choose to share using Flickr or Facebook.
To share on Flickr, select Flickr, and then enter your Flickr Username and password. Click Next.
To share on Facebook, select Facebook, and then enter your Facebook Username and password. Click Next.
Listening to music
Listen to music files from your computer or CD disc.
-
Open PowerDVD.
-
To play music from your computer hard drive, click to open Media Library on the PowerDVD main menu, and then select Music.
Figure : PowerDVD menu with Media Library open and Music selected

-
If you have inserted an audio disc into the disc drive, click to open My Computer on the PowerDVD main menu, and then select the appropriate drive.
Figure : PowerDVD menu with My Computer open and the Drive E: selected

-
To listen to an album, double-click an album. The tracks display in the media pane.
-
Click the Play/Pause
button. -
Use buttons along the bottom of the window to control your music.
-
The Music equalizer
 button allows you to set the equalizer for different types of music.
 -
The Shuffle
 button toggles between shuffle on and shuffle off for your current music.
 -
The Repeat
 button toggles between no repeat, repeat the current track or repeat the entire album.
 -
The Previous
button skips back to the previous track. -
The Stop
button stops playing music. -
The Play/Pause
button toggles between pausing and playing music. -
The Next
button skips ahead to the next track. -
The Mute/Volume adjustment
button adjusts the volume. -
The Zoom
button in the media pane, zooms in or out to view more or less music. -
The TrueTheater effects
button displays the TrueTheater effects window.
-
-
Use the Back
 button at the top of the window to return to the media pane
Using Playlists to create slideshows, audio or video playlists, or mixed media playlists
Use playlists to create any single or mixed media slideshows or playlists. Each playlist can be limited to only photos, only music, or only video, or different media can be included in one playlist.
-
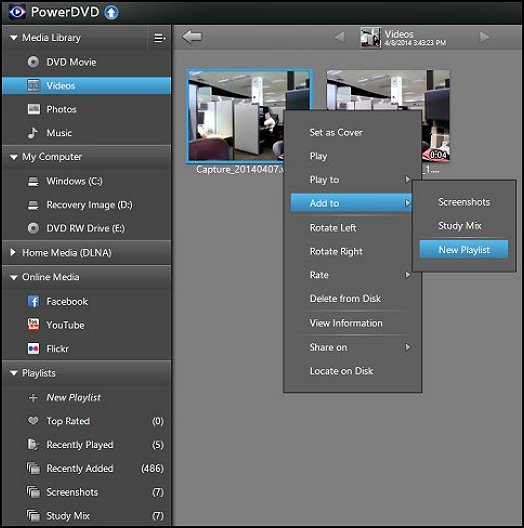
To create a playlist, right-click videos, photos, or music from the media pane to display the menu, and then scroll down to Add to to open the popup window.
Figure : Videos window with Add to and New Playlist selected
-
In the popup window, click New Playlist to create and name the playlist.
-
To view or listen to a playlist, click to open Playlists on the PowerDVD main menu, and then select the playlist from the playlist menu.
-
Click the Play/Pause
button at the bottom of the window to view or listen to the playlist. -
To add media to an existing playlist, right-click the videos, photos, or music from the media pane to display the menu, and then scroll down to Add to to open the popup window.
Figure : Photos window with Add to and existing playlist selected

-
In the popup window, select an existing playlist to add the media to that playlist.
You can also drag and drop media from the media pane into existing playlists in the playlist menu.
-
To play a playlist, click to open Playlists on the PowerDVD main menu, and select the playlist.
Then, click the Play/Pause
button. -
To delete media from a playlist, right-click the video, photo or track to open the menu, and then click Remove from Playlist.
Figure : Mixed media playlist video with Remove from playlist selected

-
To delete a playlist from the playlist menu, right-click on the playlist name to open the menu, then click Delete the selected playlist.
Figure : Playlist menu with Delete the selected playlist

-
To import or export playlists in the playlists pane, click the Import or export a playlist
 button, then select Import or Export from the popup menu. Select the location from the browser window that displays, then click Open to import a playlist, or click Save to export a playlist.
Configuring PowerDVD Settings
Use the Settings menus to customize PowerDVD. To access the Settings menus, click the Settings  button on the upper right side of the PowerDVD screen. The Settings window opens to the General menu.
note:For more detailed information about the Settings menus, use the CyberLink PowerDVD application help. To access PowerDVD Help, click the help
Each Settings menu allows you to choose configuration options for CyberLink PowerDVD. Click on a menu heading to choose settings.
-
Use the General menu to name your PowerDVD and choose the language.
-
Use the Library menu to select folders to scan for new media each time you launch the PowerDVD application.
-
Use the Player menu to choose options for how PowerDVD starts up and functions.
-
Use the Video menu to set TrueTheater options or the color profile.
-
Use the Audio menu to set the speaker environment and output mode.
-
Use the DVD menu to set DVD features and manage chapter viewer thumbnails.
-
Use the Home Media (DLNA) menu to share media with home media clients.
-
Use the MoovieLive menu to set options for using MoovieLive.
-
Use the Information menu to view DVD player information and specifications.
CyberLink PowerDVD version 10 or 11
PowerDVD allows you to view and manage movies, videos, photos, and music.
Figure : PowerDVD main menu

Watching movies
Follow these steps to watch movies:
-
Open PowerDVD.
-
Insert a movie disc (DVD or Blu-Ray) into the disc drive on your computer.
note:
Make sure that the movie disc is compatible with the disc drive on your computer.
-
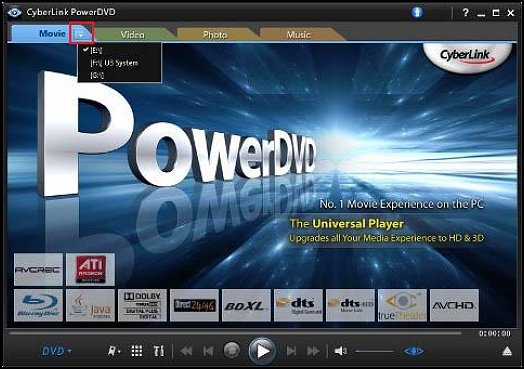
Click the Movie tab on the PowerDVD menu and click the arrow in the tab to display the drop down menu, then select the device that contains the movie disc.
Figure : Select movie device
note:
The first time you load a Blu-ray movie disc, you are asked to enter a region and country code in the Settings menu. Select your Country code and Region code, then click OK.
Figure : Blu-ray region selection screen

-
The movie loads into the computer and starts playing.
Figure : Blu-ray disc loading message

-
Use the control buttons to stop or pause the movie.

-
If you stop or close PowerDVD while playing a movie, and even play other media afterwards, the next time you play that specific disc title, you can click Resume to continue from the point where you previously stopped watching or click Restart to watch the disc from the beginning.
Figure : Movie resume or restart screen

-
To remove a movie disc from the disc drive, click the Eject disc
button in the lower right corner of the screen.
Viewing and uploading videos and creating playlists
View videos, create and view video playlists, and upload videos to YouTube.
-
Open PowerDVD.
-
Click the Video tab on the PowerDVD main menu. The video screen displays.
-
Source pane
-
Playlists pane
-
Media pane
-
Eject disc button
Figure : PowerDVD Video screen

-
-
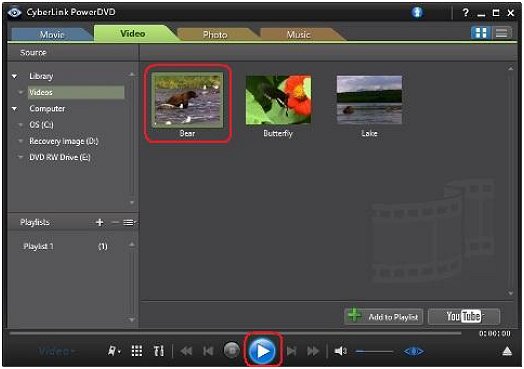
You can view videos from the disc drive or the hard drive on your computer. To view a video, select the location from the source pane. The video files display in the media pane. Select the video from the media pane, then click the Play/Pause
button.Figure : Video screen with video selected
-
To create a playlist, select the video files from the media pane, then click the Add to Playlist button. In the popup window, click New Playlist to create the playlist.
Figure : Adding a video to a playlist

-
To start viewing a playlist, select the playlist from the playlists pane, then click the Play/Pause
button. -
To add video files to an existing playlist, select the video files from the media pane, then click the Add to Playlist button. In the popup window click the name of the playlist where you want to place your video.
You can also drag and drop video files from the media pane into existing playlists in the playlists pane.
-
To delete a video from a playlist, select the video file, then click Remove from playlist.
-
To delete a playlist from the playlists pane, click the playlist name to highlight it, then click the Delete
 button.
 -
To import or export playlists in the playlists pane, click the Import or export a playlist
 button, then select Import playlist or Export playlist from the popup menu. Select the location from the browser window that displays, then click Open to import a playlist, or click Save to export a playlist.
 -
To remove a video disc from the disc drive, click the Eject disc
button in the lower right corner of the screen. -
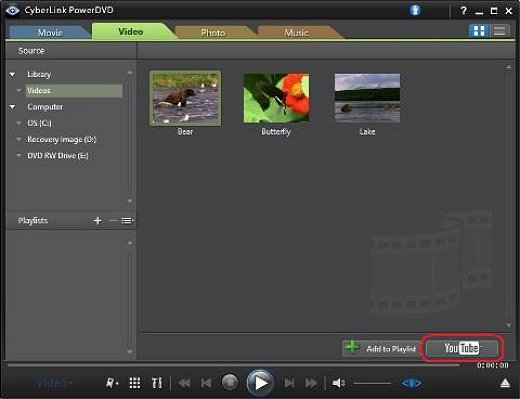
To load a video to YouTube, select the video from the media pane, then click the YouTube button.
Enter your YouTube Username and password, then click Next.
Figure : Loading a video to YouTube
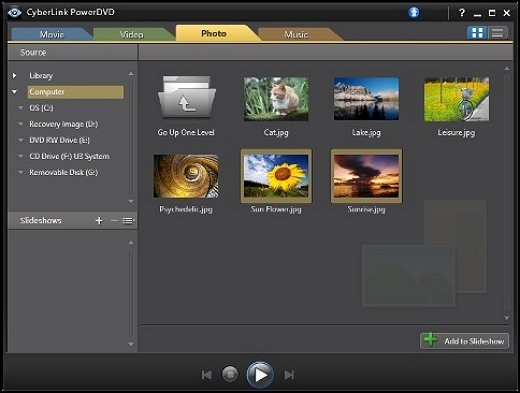
Viewing photos and creating slideshows
View photos, and create, view, modify, import, and export slideshows.
-
Open PowerDVD.
-
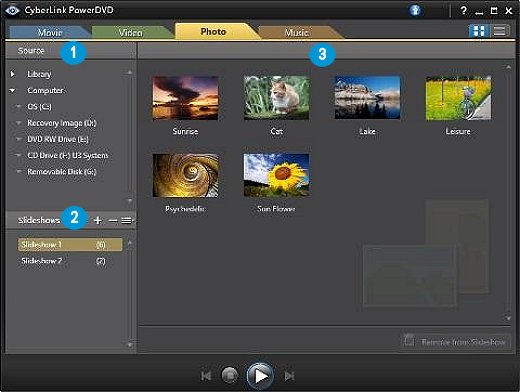
Click the Photo tab on the PowerDVD main menu. The photo menu displays.
-
Source pane
-
Slideshows pane
-
Media pane
Figure : PowerDVD Photo screen
-
-
To view photos, select a location from the source pane. The photos display in the media pane.
-
To create a slideshow, select photos from the media pane, then click the Add to Slideshow button. In the popup window, click New Slideshow to create the slideshow.
note:
To rename a slideshow click on the slideshow title, and then click one more time. Use your keyboard to change the name.
Figure : Add photos to slideshow
-
To view a slideshow, select the slideshow from the slideshow pane, then click the Play/Pause
button. -
To add photos to an existing slideshow, select the photos from the media pane, then click the Add to Slideshow button in the media pane, or click the Add
 button in the slideshow pane. In the popup window, click the name of the slideshow where you want to place your photos. You can also drag and drop photos from the media pane into existing slideshows in the slideshow pane.
 -
To remove photos from an existing slideshow, select the slideshow from the slideshow pane, click on the photo in the media pane that you want to remove, and then click on the Remove from Slideshow button.
-
To delete a slideshow from the slideshow pane, click on the slideshow name to highlight it, then click the Delete
button. -
To import or export slideshows in the slideshow pane, click the Import or export a slideshow
button, then select Import Slideshow or Export Slideshow from the popup menu. Select the location from the browser window that displays, then click Open to import slideshows, or click Save to export slideshows.
Listening to music and creating playlists
Listen to music files from your computer or CD disc, and create, play, modify, import, and export music playlists.
-
Open PowerDVD.
-
Click the Music tab on the PowerDVD main menu. The music screen displays.
-
Source pane
-
Playlists pane
-
Media pane
-
Eject disc button
Figure : PowerDVD Music screen

-
-
If you have inserted an audio disc into the disc drive, select the disc drive from the source pane to play music from the disc.
-
To play music from the computer hard drive, select the location of the music files from the source pane. The music files display in the media pane. Double-click the file you want to play.
Figure : Add music to playlist

-
To create a playlist, select the music files from the media pane, then click the Add to playlist button. In the popup window, click New Playlist to create the playlist.
note:
To rename a playlist click on the playlist title, and then click one more time. Use your keyboard to change the name.
-
To start listening to a playlist, select the playlist from the playlists pane, then click the Play
button. -
To add music files to an existing playlist, select the music files from the media pane, then click the Add to Playlist button in the media pane or click the Add
button in the playlists pane. In the popup window, click the name of the playlist where you want to place your music. You can also drag and drop music files from the media pane into existing playlists in the playlists pane. -
To remove a music file from an existing playlist, select the playlist from the playlists pane, click on the music file in the media pane that you want to remove, and then click on the Remove from Playlist button.
-
To delete a playlist from the playlists pane, click on the playlist name to highlight it, then click the Delete
button. -
To import or export playlists in the playlists pane, click the Import or export a playlist
button, then select Import playlist or Export playlist from the popup menu. Select the location from the browser window that displays, then click Open to import a playlist, or click Save to export a playlist.
Configuring PowerDVD Settings
Configure PowerDVD using the settings menus to customize PowerDVD. To access the settings menus, click the Settings  button, or press Ctrl + C on the keyboard. The Settings window opens to the User Interface menu.
note:For more detailed information, use the CyberLink PowerDVD application help. To access PowerDVD Help, click the help
Each Settings menu allows you to choose configuration options for CyberLink PowerDVD. Click on a menu heading to choose settings.
-
Use the User Interface menu to choose appearance and language.
-
Use the Player menu to choose options for how PowerDVD starts up and functions.
-
Use the Video menu to select hardware acceleration, truetheater options or the color profile.
-
Use the Audio menu to set the speaker environment and output mode.
-
Use the Aspect Ratio menu to select display preference and device.
-
Use the DVD menu to set DVD features and manage chapter viewer thumbnails.
-
Use the Blu-ray Disc menu to define the country and manage BO-J application certification.
-
Use the MoovieLive menu to set options for using MoovieLive.
-
Use the Information menu to view DVD player information and specifications.
How To Play Dvd On Laptop Hp
Source: https://support.hp.com/id-en/document/c04222533
Posted by: hoserearget1982.blogspot.com
0 Response to "How To Play Dvd On Laptop Hp"
Post a Comment